How To Build DIY Drip Irrigation System For Potted Plants
A drip watering system for potted plants is a blessing as it helps in keeping our container plants fully moisturized and healthy even if the weather is dry, hot, or, when you are not at home to look after them personally. This system actually delivers water directly to the roots, thereby keeping potted plants like cantaloupes and pumpkins watered and alive. Such a system of watering also saves time and is pretty easy to be installed by anyone. Today, we have explained in detail some easy steps involved in building and setting up DIY drip irrigation system. So take a look and get started!
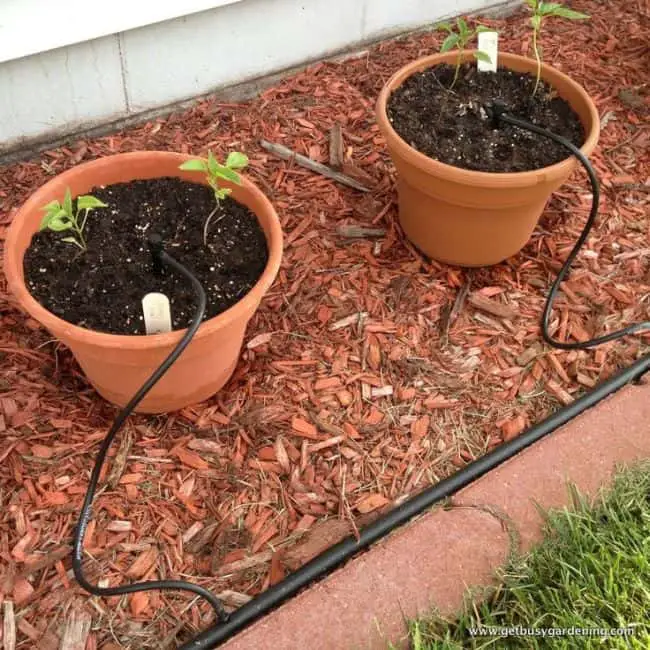
Image Credit: pinterest
Defining DIY drip irrigation system
What exactly is drip system for pots, one may ask? Well, to begin with, such a system of watering potted plants is a process that enables you to water the roots of your plants directly at the roots. It is an automatic watering system for your plants. Unlike sprinklers that spray water into the air and over a large area, the DIY drip irrigation system focuses on making water available at the roots. It can either be operated manually, or can be set up on an automatic timer that waters plants on its own. If you have a garden hose, you can hook the system directly to it. This will allow you to water your potted plants as and when the hose is turned on.
Advantages of building homemade drip Irrigation for potted plants
There are many benefits of building and installing a DIY drip irrigation for containers for any gardener. For starters, such a system saves you a lot of time in watering each and every potted plant. If you happen to have a lot of container plants around the house, then, owning such a system is a boon as it will allow you to keep your plants fully nourished without you having to worry about watering them personally.
The potted plants benefit a lot from a DIY automatic watering system that takes water directly to their roots, thereby, keeping them fully moisturized. The system takes the right amount of water needed by the plants. Constant watering ensures healthy growth and propagation.
The best part about a DIY drip irrigation system is that it is pretty easy to install. You can either buy a kit for this purpose, or can also make your own system using old and discarded bottles.
Also Read: 25 DIY Pea Trellis Ideas for your Garden
Types of DIY drip irrigation for containers
There are two very commonly used DIY drip irrigation system by gardeners. These are systems made using old bottles, and such that involve the use of drip irrigation kit comprising of hose, connector, spikes, tubes and so on. Both these types are easy to build and install on own.
How to install drip irrigation using bottles
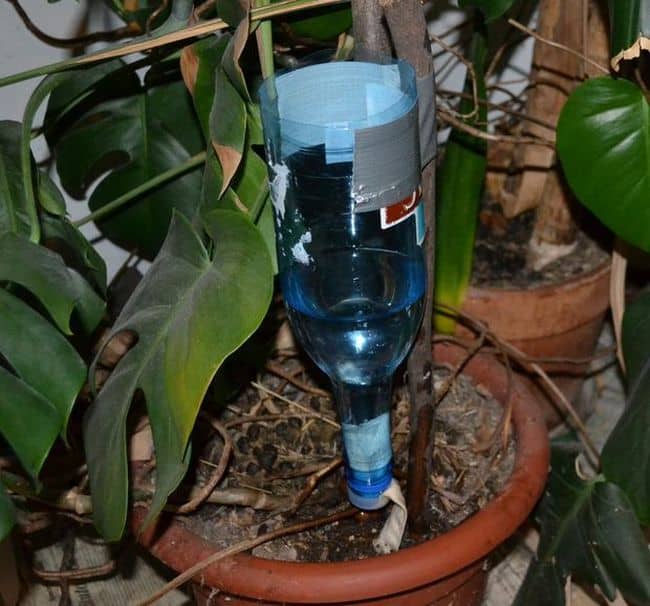
Image Credit: instructables
Building and installing such a system using bottles is quite easy and doesn’t require any socialization on your part. Some basic things you will need for getting this system working are old plastic bottles, some fabric, and a stick.
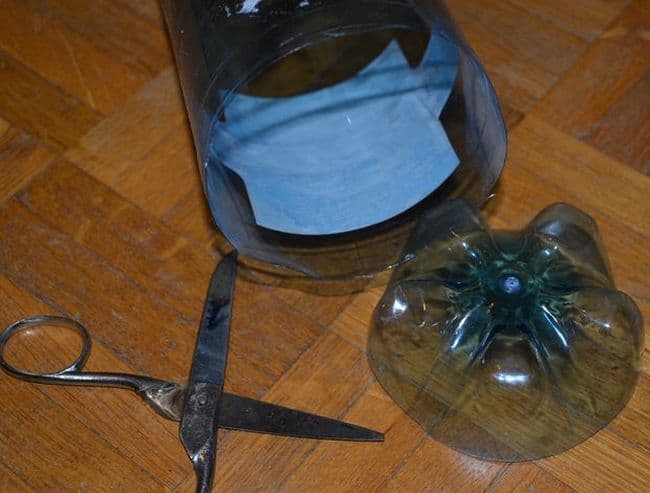
Image Credit: instructables
The first step in building this easy system involves cutting the bottle in such a way so that its bottom gets chopped off. You can use a scissor for this purpose.
Now, twist the cap of the bottle lightly so that it is loosened. Then, shove the fabric piece inside it and then, close the cap. Whether you want the cap to be tightened or loosened will depend on how much water you want the plants to receive. For a fast paced dripping, let the cap a little loose or less tight. For slow paced dripping, close the cap tightly.
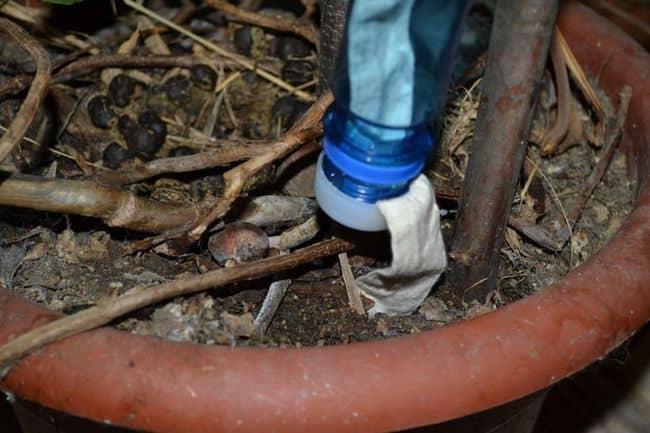
Image Credit: gunook
Now, using a tape, join or attach the bottle to the stick which you have gathered for installing this system. Then, insert the stick with the taped bottle in the pot. Leave a part of the fabric close to the soil.
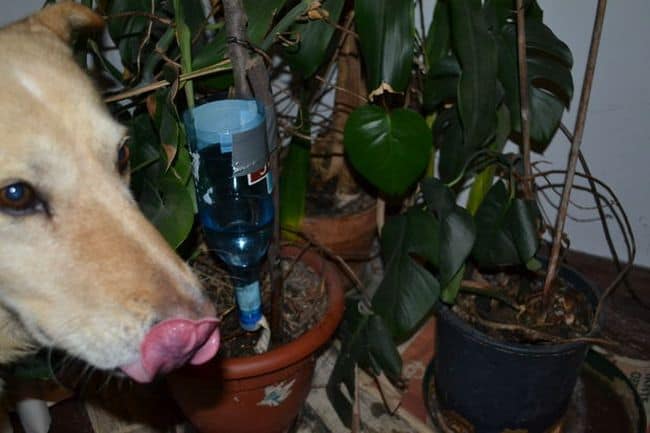
Image Credit: gunook
Now, pour water inside the bottle and adjust the speed of water dripping from it.
Drip system for pots using the kit
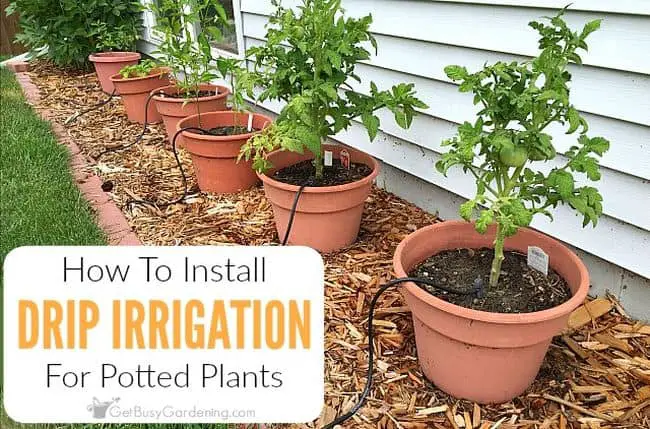
Image Credit: getbusygardening
If you have too many potted plants in your home and garden, then the best way to irrigate them is to build and install such a drip system that uses a kit involving a plethora of things to make watering an easy and a painless job. In case you have at least 15 to 20 containers to water, then use a kit that consists of greater number of tools. But, if you have lesser number of pots, then a small kit will serve the purpose.
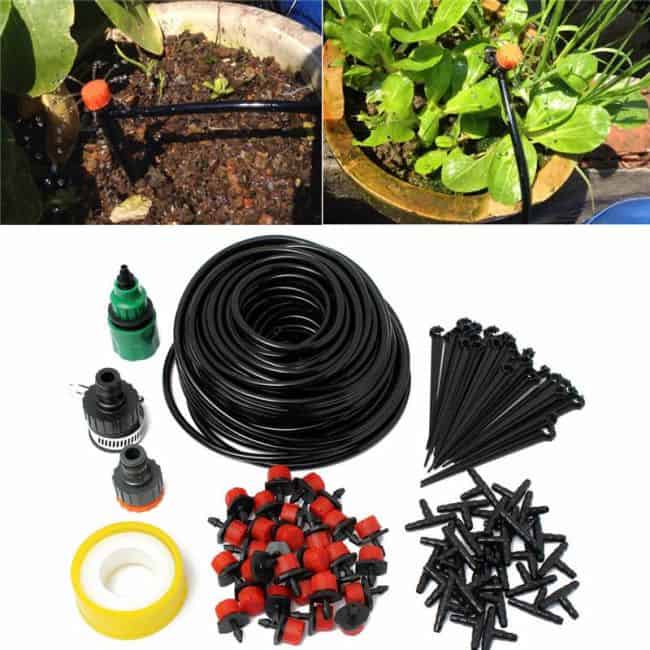
Image Credit: aliexpress
All DIY kits are sold at reasonable costs and come with detailed instructions on how to set them up. Selection has to made depending on what you want. Typically the supplies needed would include mainland drip irrigation hose measuring at least 1/2 inches, drip irrigation back flow preventer, poly tubing end cap, hose connector, micro tubing made of vinyl and measuring 1/4 inches, spikes, drip irrigation hole punch, drip hose goof plugs, timer, measuring tape, drippers with spikes for each pot, hose splitter, and PVC pipe cutting saw.
Also Read: 31 Awesome Gardening Hacks and Tips for your Garden
How to install drip irrigation using the kit
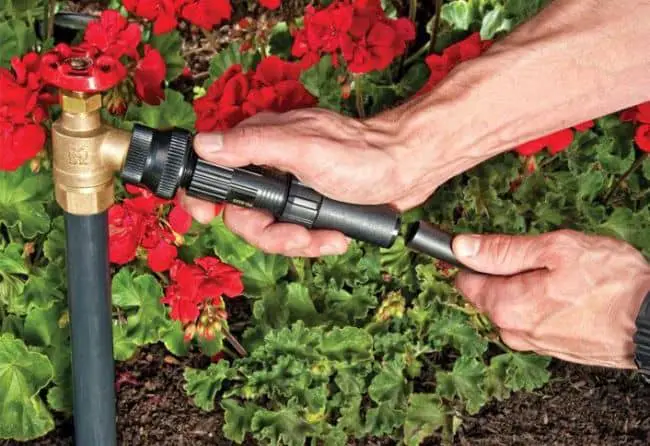
Image Credit: homedepot
You have to follow certain basic steps for installing a DIY drip irrigation system. Firstly, you have to start attaching connectors to the faucet or the hose. For this purpose you will begin by screwing the backflow preventer to the faucet or the hose. Now, the pressure regulator has to be screwed followed by the hose fitting. This has to be done in this sequence and is pretty easy.
Next comes the turn of attaching the 1/2 inches poly tubing to the hose fitting. The hose fitting has an open end and the tubing has to be pushed inside it. After this, the collar built on the hose fitting has to be pulled down and tightened.
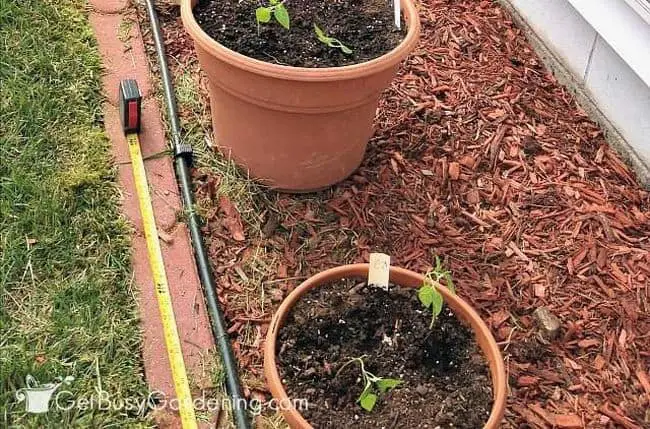
Image Credit: getbusygardening
Next, you have to measure the space between each dripper and conjure up the exact drip irrigation system design in your mind before going ahead with the installation. The space will determine the installation spot of your micro tubing. Begin this step by placing your containers or pots at designated spots, then, lay out the poly tubing hose in front of each of the containers. Once you have done this, you have to get an idea of the measurement of the space between each pot. Take a measuring tape for this purpose and then mark the poly tubing. It is at these marked spots that you will place your drip tube lines. Afterwards, the poly tubing has to be cut from the bottom using PVC cutting saw. Then, fasten the poly tubing end cap to the tube.
Now, you have to measure the micro tubing pieces for the drip lines. This is done so as to understand the exact length of the drip lines, from the marked spot on the poly tubing to the place where the drip heads are positioned. Keep the tubing pieces loose and not too tightened for you to be able to move the pots if needed.
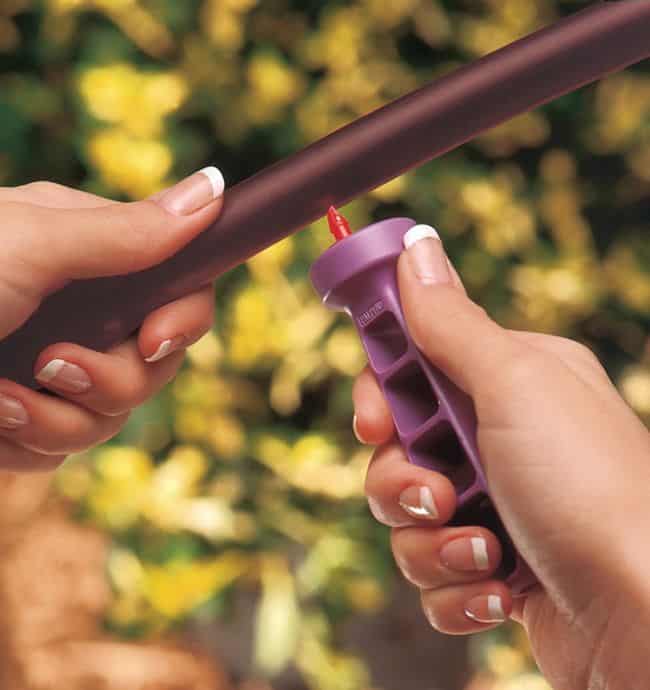
Image Credit: rainbird
In the next step towards installing your homemade drip irrigation for potted plants, you have to set up the irrigation drip lines and micro sprinkler heads. The drip lines will be installed in the poly tubing by punching holes in the marked spots.
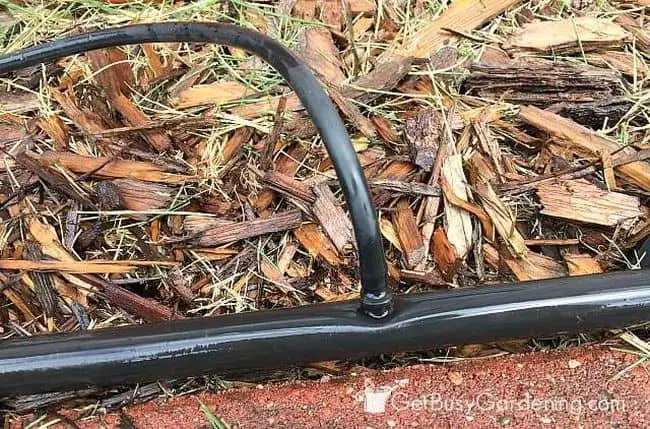
Image Credit: getbusygardening
Now, comes the turn of attaching the connector to the main tube, and the micro tubing drip hose to the connector’s other end.
Installation of the dripper heads comes next in which you have to take the open end of the micro tubing and plug in the dripper heads. Afterwards, you have to put these dripper heads inside the pots.
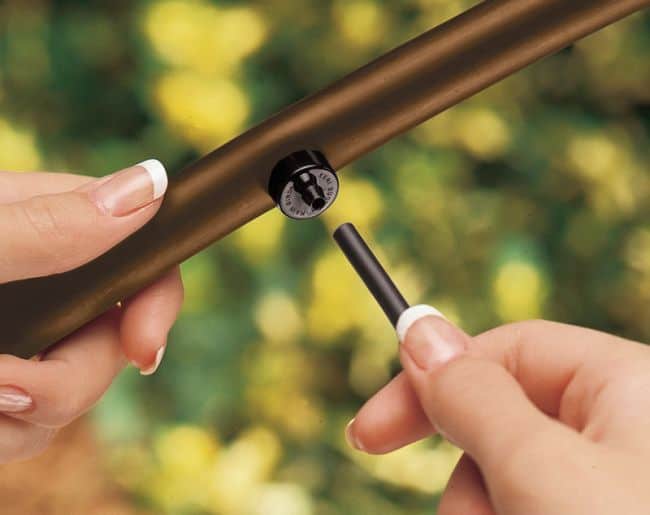
Image Credit: rainbird
You have to test the drip irrigation system you just installed by looking for leakage. You may have to make adjustments to the drip heads to check if they are working fine. Sometimes, the drip heads, if not installed properly may lead to water being sprayed outside the pots, or at places where you do not need it.
As the second last step, the poly tubing installed has to be secured once its tested and tried. Hold the main line poly tubing to the ground by using tubing stakes meant specially for drip irrigation systems. These have clippers that clip on easily to the poly tubing line. Take such stakes that measure about 1/2 inches in length. After you have clipped on the stakes, and added mulch to the ground, its time for burying the tubing underneath it. This is done so that the whole irrigation system remains out of sight.
Also Read: How to Irrigate Plants with Fish Tank Water
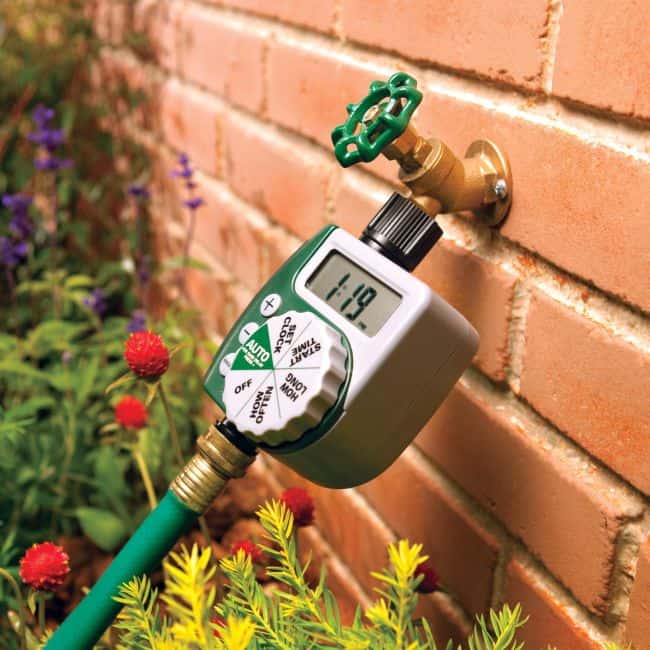
Image Credit: amazon
Finally, its time for the automatic watering timer to be set. The timer will see to it that your plants get watered regularly at set times without you having to worry about the whole affair. You can switch the timer on and off as per the weather and other conditions.
Final Thoughts
Potted plants need a lot of pampering just like our house pets. The moment you start neglecting them, they start to wither. If you are looking for hassle free gardening, then DIY drip irrigation system is simply perfect for you. Its less time consuming and also pretty cheap.

