How to Grow Chickpeas : A complete Guide

Chickpeas are not merely tasty but are also power packed with protein. These are also called garbanzos and can be grown with minimum cost. Here is a step by step How to grow chickpeas guide that will help in answering many questions related to cultivating these. A fibrous legume, chickpeas are healthy and offer many benefits. Chickpeas growing season is pretty long and these grow abundantly in warm places. Reaching harvest in 100 days time, chickpeas do not need much maintenance, except for a few basics.
Check out the under mentioned steps in growing these yummy legumes:

Image Credit: organicfacts
Plant the seeds
The first and foremost step in growing any crop is to plant its seeds. And the same goes for chickpea plants. Here we will cover a few basic points that are considered very important.

Image Credit: blogspot
Start by sowing chickpeas seeds indoors. Its a common fact that chickpeas are delicate and its best to sow these indoors and not outdoors where the temperature of the ground can fluctuate to cause damage to the crop. In case you are planning for an outdoor sowing, then make sure to get the ground covered by a light mulch for offering just the right dosage of warmth. Begin planting the seeds at the start of the year as it takes almost 100 days for the chickpeas to reach full harvest.
Always use biodegradable pots such as paper pots for sowing chickpea seeds as these can be planted easily right into the ground when you transplant the seedlings. Using ceramic pots is not recommended as these cannot be planted in the ground and you have to take out the whole seedling from the pot, causing wastage of time and damage to the plant. For buying paper pots, search the local gardening shops or centers.
Its always a better idea to plant not more than two chickpea seeds in each pot. However, if you want an abundant growth, go for one seed per pot. Firstly, the pots need to be filled with potting soil after which seeds can be planted. Keep the depth to 1 to 2 inches. If there are two seedlings planted, then you have to cut out one of them when they sprout using scissors. Typically, seeds of chickpeas sprout in two weeks time.
Watering and showing sun is a vital step and you need to do this routine every day. In case the weather turns immensely warm, water the seedlings twice whereas showing them sun once will do the work. Always keep your seedling pots near the windows that receive good sunlight. However, always make sure that you do not over heat the seeds as it may damage them. Also, refrain from watering in excess once the seeds are sowed.
Also Read: How To Grow Bell Peppers Indoors From Seeds
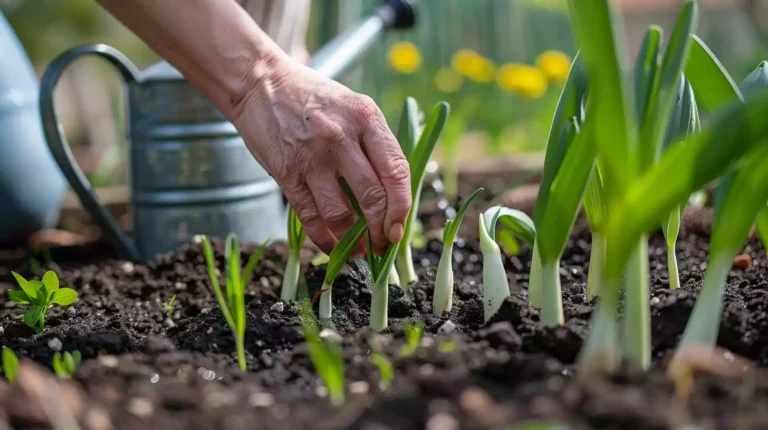
Transplant the seedlings
Once you have sowed the chickpea seedlings in biodegradable pots, take these out in the garden as part of transplanting process. By transplanting, we mean moving the potted seedlings into the ground.

Image Credit: ytimg
Before you transplant, you have to keep in mind the exact location where your chickpea seedlings will be planted as the place chosen plays a vital part in determining the successful growing of this legume. For a chickpea seedling to grow healthily, you may want a place that receives abundant sunlight. Pick a place that gets at least six to seven hours of sunlight each day. Also, the bed on which you will transplant the seedlings must have soil that’s loosened up and is enriched organically.
Never plant seedlings of chickpeas in places that get no sunlight or have soils that have high content of nitrogen. However, you can have a light shade to prevent over heating of the seedlings.
Mix in compost and fertilizer for preparing the soil for chickpea transplantation. Adding compost to soil a week prior to transplanting is a good idea as it helps in enriching the soil with vital nutrients. The fertilizer chosen for transplanting chickpeas seeds must contain essential dosage of phosphorus and potassium for a good yield. If you search any ‘how to grow chickpeas‘ guide, you will always find a mention of using fine textured gravel as this helps to drain excess water.
Always start the process of transplantation once the frost disappears. The risk of crop damage is the highest when seeds are planted right away when frost is at its peak. Let the temperature rise and wait for it to reach 21 to 27 degrees Celsius when you can safely transplant your seedlings.
Do not keep too much space between each seedling. The optimal space between each should be 5-6 inches. This will ensure a good growth as chickpea plants need support of each other while growing. For a row plantation, maintain the space between 18-24 inches.
The pots must be buried in the holes assigned in such a way that they fit inside completely. Once buried, the edges of the pots must be covered with extra amounts of soil.
Regular care and maintenance routine
Once your seedlings have been transplanted outside in the garden, its time for regular care and upkeep. This includes daily watering, mulching and fertilizing to ensure optimal growth.

Image Credit: serenataflowers
Watering is a daily ritual for growing plants and hence, you must make it a point to treat your chickpea seedlings with enough water to nourish these. In case you have planted during dry or summer season, water regularly. If your chickpeas have entered the flowering stage, then water at least twice a week. If its monsoons, then you can depend on rainfall. One has to be careful so as not to break the flowers or pods when watering as any direct watering from top can cause these to break. Only water the soil and not the plants. However, watering schedule will change once your chickpea pods mature and the plants start to dry. In this case, you can water once every week.
Mulching is important to retain moisture. A mulch helps in offering a protective cover to the crop and is an essential part of agriculture. Mulching also helps in prevention of weeds, thereby making the crop bed look clean and visually attractive. You can use any type of mulch for this purpose. But, using an organic mulch will help you maintain the fertility of the soil.
Once mulching is done, its time for fertilizing. When spraying fertilizers, make sure to use mainly such varieties that do not have nitrogen as chickpeas produce their own nitrogen and any extra dosage will make the chickpea leaves grow fuzzy. Always go in for an organic variety when fertilizing.
Do not disturb the roots of your chickpea plant. One has to be extremely cautious so as not to damage the root system of the plants while removing weeds or handling the whole plant. When your chickpea plants have been watered or are wet, do not handle them at once. Wait for the water to dry up as any handling of wet chickpea plants can encourage the growth of fungus spores which will eventually damage the whole crop.
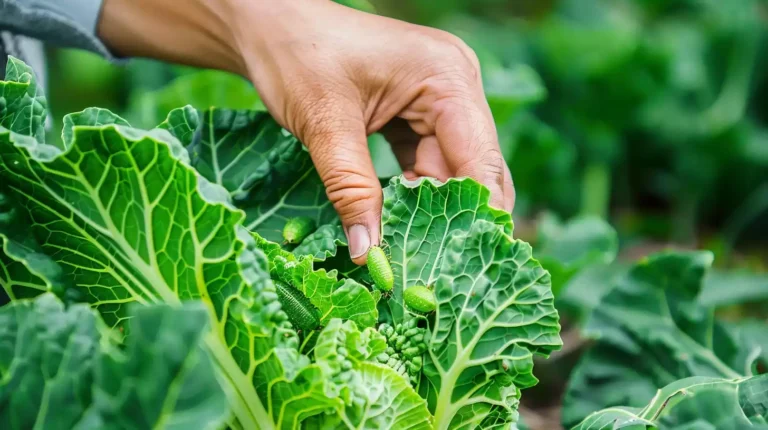
Pests and Diseases
Taking care of pests to ensure that you grow chickpeas healthily. Pests or insects are a major concern when cultivating crops and your chickpeas are also vulnerable to these menaces. Some common pests that need to be controlled include mites and leaf hoppers. You can use soaps made specially for treating pest infested plants. Any presence of insect eggs on the leaves is the first sign of insect infestation, and you must immediately set on crushing these with your hands when you inspect your plants. Or else, cut away the portion of leaves that have eggs. An easy solution to solving your pest problem is to maintain tidiness in your garden. However, if your pest problem has gone overboard, then you need to treat the plants with a strong fertilizer. An organic fertilizer is always best in this regard.
For an optimal yield, grow chickpeas in a disease free environment. For this you need to check out the presence of harmful diseases that may hamper the growth. Some common diseases to affect chickpea plantations include anthracnose and blight. You can take simple measures to ensure that the crop remains disease free like keeping the soil bed clean and fungus free. Once you have detected a diseased leaf or any part, simply remove it and burn to avoid spreading of the disease.
Also Read: How To Grow Cauliflower From Seeds in Pots
Harvesting the chickpea plants
Harvesting is the last stage in chickpeas growing season and it usually includes two types, namely – fresh harvest and dry harvest. Chickpeas can be used for consumption either in their fresh or dried forms. A fresh harvest allows you to remove the green pods and consume these raw. A pod will contain 1 to 3 beans. A dry harvest ensures your chickpeas get thoroughly mature and dry. Once the plants turn brown and die, you have to harvest the whole chickpea plant. Let the pods dry on their own after the plants have dried and then remove the beans once these pop open.

Image Credit: bloominthyme
After harvesting is done, the chickpeas need to be stored carefully. If you have dry harvested the beans, then store these in air tight jars or containers and keep these in a dry place. For fresh un-shelled chickpea beans, store these in the fridge. These will last for about a week or so.

Image Credit: atmedia
A chickpea is a popular legume consumed all round the world and is high in protein. Laced with potassium, Omega 6 and Vitamin B3, chickpeas are a nutritious variety of beans. Growing chickpeas is not difficult and with a little assistance, all of you can manage to grow healthy chickpea crop.
Final Thoughts
We do hope that these above mentioned tips on how to grow chickpeas have encouraged you to grow your own chickpea plants.