How to Build Raised Garden Beds Step by Step
Imagine transforming a bare patch of yard into a thriving garden paradise where plump tomatoes dangle from emerald vines and vibrant marigolds border crisp lettuce rows.
Building raised garden beds unveils this dream with surprising simplicity, requiring just basic carpentry skills and an afternoon’s work.
These elevated wooden frames create perfect growing conditions while adding rustic charm to any outdoor space. The journey from bare ground to bountiful harvest begins with understanding five essential steps that guarantee success.
Quick Summary
- Choose a location with 6-8 hours of daily sunlight and good drainage, with beds 4 feet wide and 12-24 inches high.
- Gather rot-resistant wood, galvanized screws, drill, landscape fabric, level, measuring tape, and handsaw for construction.
- Assemble the rectangular frame by connecting boards at corners using pre-drilled holes and galvanized screws.
- Line with landscape fabric, then fill with mixed soil: one-third compost, one-third peat moss, one-third vermiculite.
- Plant seeds or seedlings with proper spacing, then maintain through consistent watering, weeding, mulching, and fertilizing.
Selecting the Perfect Location and Size for Your Raised Bed
Where sunlight dances across the yard becomes the foundation for a thriving raised garden bed. Observing how light moves throughout the day reveals prime spots receiving six to eight hours of golden rays.
Southern exposures offer maximum sunlight exposure, nurturing vegetables that crave warmth and brightness. The ideal location combines radiant sun with excellent drainage considerations, avoiding low areas where water pools after rainfall.
Measuring the space determines bed dimensions, with four feet wide allowing comfortable reach from both sides. Length adapts to available area, while height between twelve and twenty-four inches creates perfect growing depth for roots to flourish abundantly.
Gathering Materials and Tools You’ll Need
The right materials transform ambitious garden dreams into tangible wooden structures brimming with potential. Cedar boards gleam with warm honey tones, while pressure-treated lumber offers budget-friendly durability for years of growing seasons.
Material types include rot-resistant wood, galvanized steel corners, and landscape fabric to protect precious soil.
Tool essentials bring these components together: a reliable drill, rust-proof screws, a carpenter’s level for perfect alignment, and a measuring tape for precise cuts. A handsaw completes the collection, slicing through wood with satisfying efficiency.
These simple supplies reveal endless possibilities for cultivating verdant vegetables and fragrant herbs.
Assembling Your Raised Garden Bed Frame
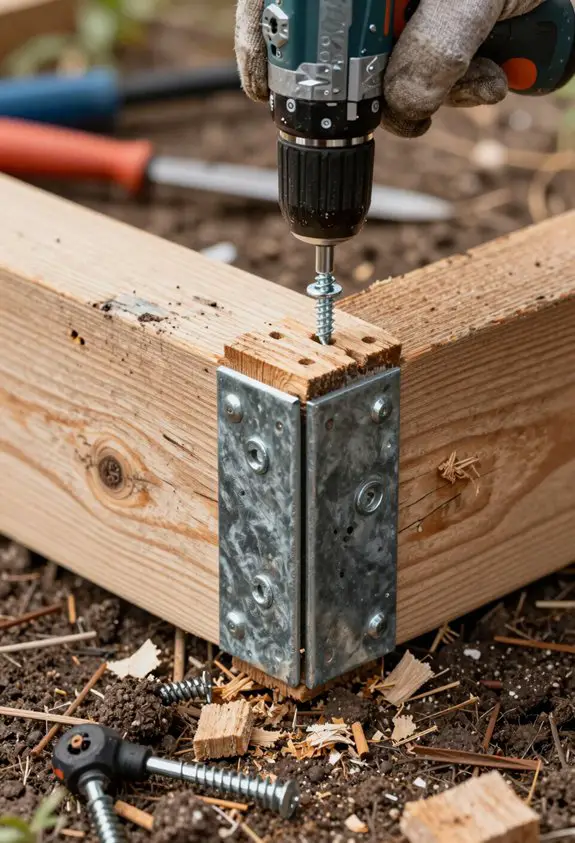
With materials spread across the workspace like pieces of a wooden puzzle, construction begins by laying out the four boards in their final rectangular shape.
The frame materials connect seamlessly when proper assembly techniques guide each movement, creating corners that meet with satisfying precision.
Galvanized screws pierce through pre-drilled holes, binding golden cedar planks into a sturdy rectangle that promises years of bountiful harvests.
Each joined corner represents another step toward that dreamy garden vision, where vegetables will eventually cascade over warm wooden edges.
The assembled frame stands ready, transforming from scattered lumber into the foundation of growing dreams.
Preparing and Filling Your Bed With Quality Soil
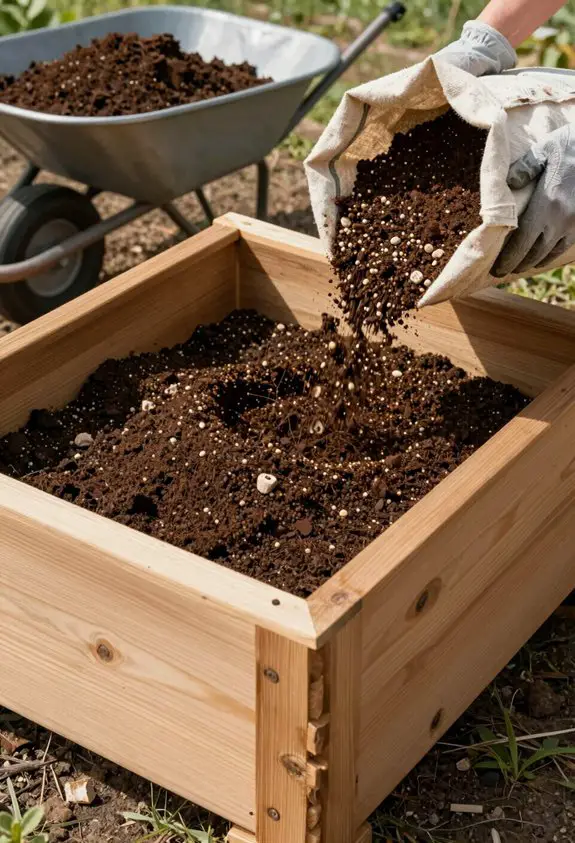
Before any seeds nestle into their new home, the empty frame demands transformation through layers of carefully selected growing medium.
Smart gardeners begin with landscape fabric along the bottom, creating excellent drainage solutions that prevent waterlogging while blocking persistent weeds.
Next comes the enchantment: blending rich compost with premium topsoil creates the perfect foundation.
Different soil types serve unique purposes, so mixing one-third compost, one-third peat moss, and one-third vermiculite produces fluffy, nutrient-dense earth.
This golden mixture welcomes roots with open arms, promising abundant harvests and vibrant blooms that dance beneath summer sunlight.
Planting and Maintaining Your New Raised Garden Bed
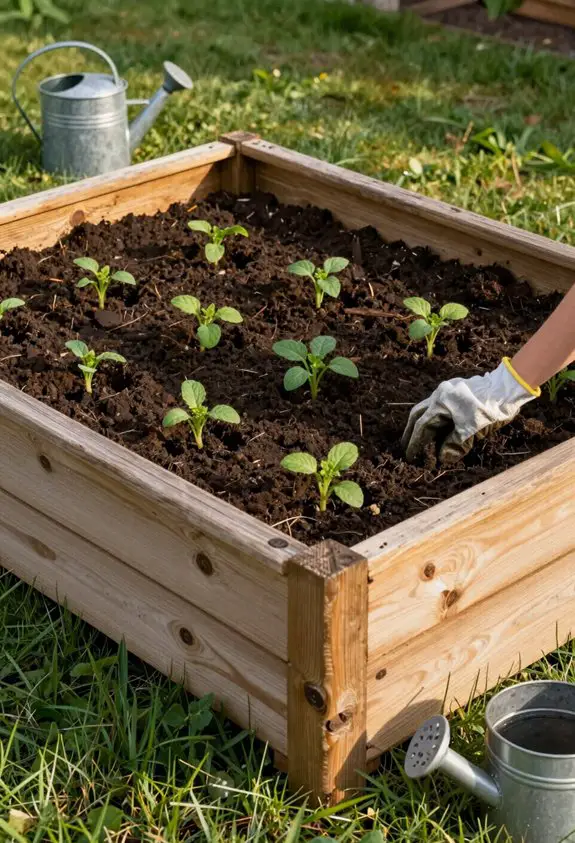
Once the soil settles into its frame like a promise waiting to unfold, eager hands can finally press seeds and seedlings into their welcoming earth.
Strategic planting techniques transform empty beds into thriving havens, spacing each plant according to its mature size and sunlight needs.
Vibrant tomatoes claim sunny corners while leafy greens nestle in cooler spots, creating living tapestries of emerald and jade.
Regular garden maintenance keeps this paradise flourishing through consistent watering schedules, gentle weeding sessions, and organic fertilizer applications.
Coffee grounds work exceptionally well as slow-release fertilizer, enhancing soil structure while providing essential nutrients like magnesium, potassium, and phosphorus.
Mulch blankets the soil surface, locking in precious moisture while suppressing unwanted growth, ensuring every plant reaches its fullest potential.
Transform kitchen scraps like banana peels, eggshells, and coffee grounds into organic compost to nourish your raised bed plants naturally.